Showing posts with label Jawa. Show all posts

Sunday, July 19, 2015

Chess Jawa - Medium

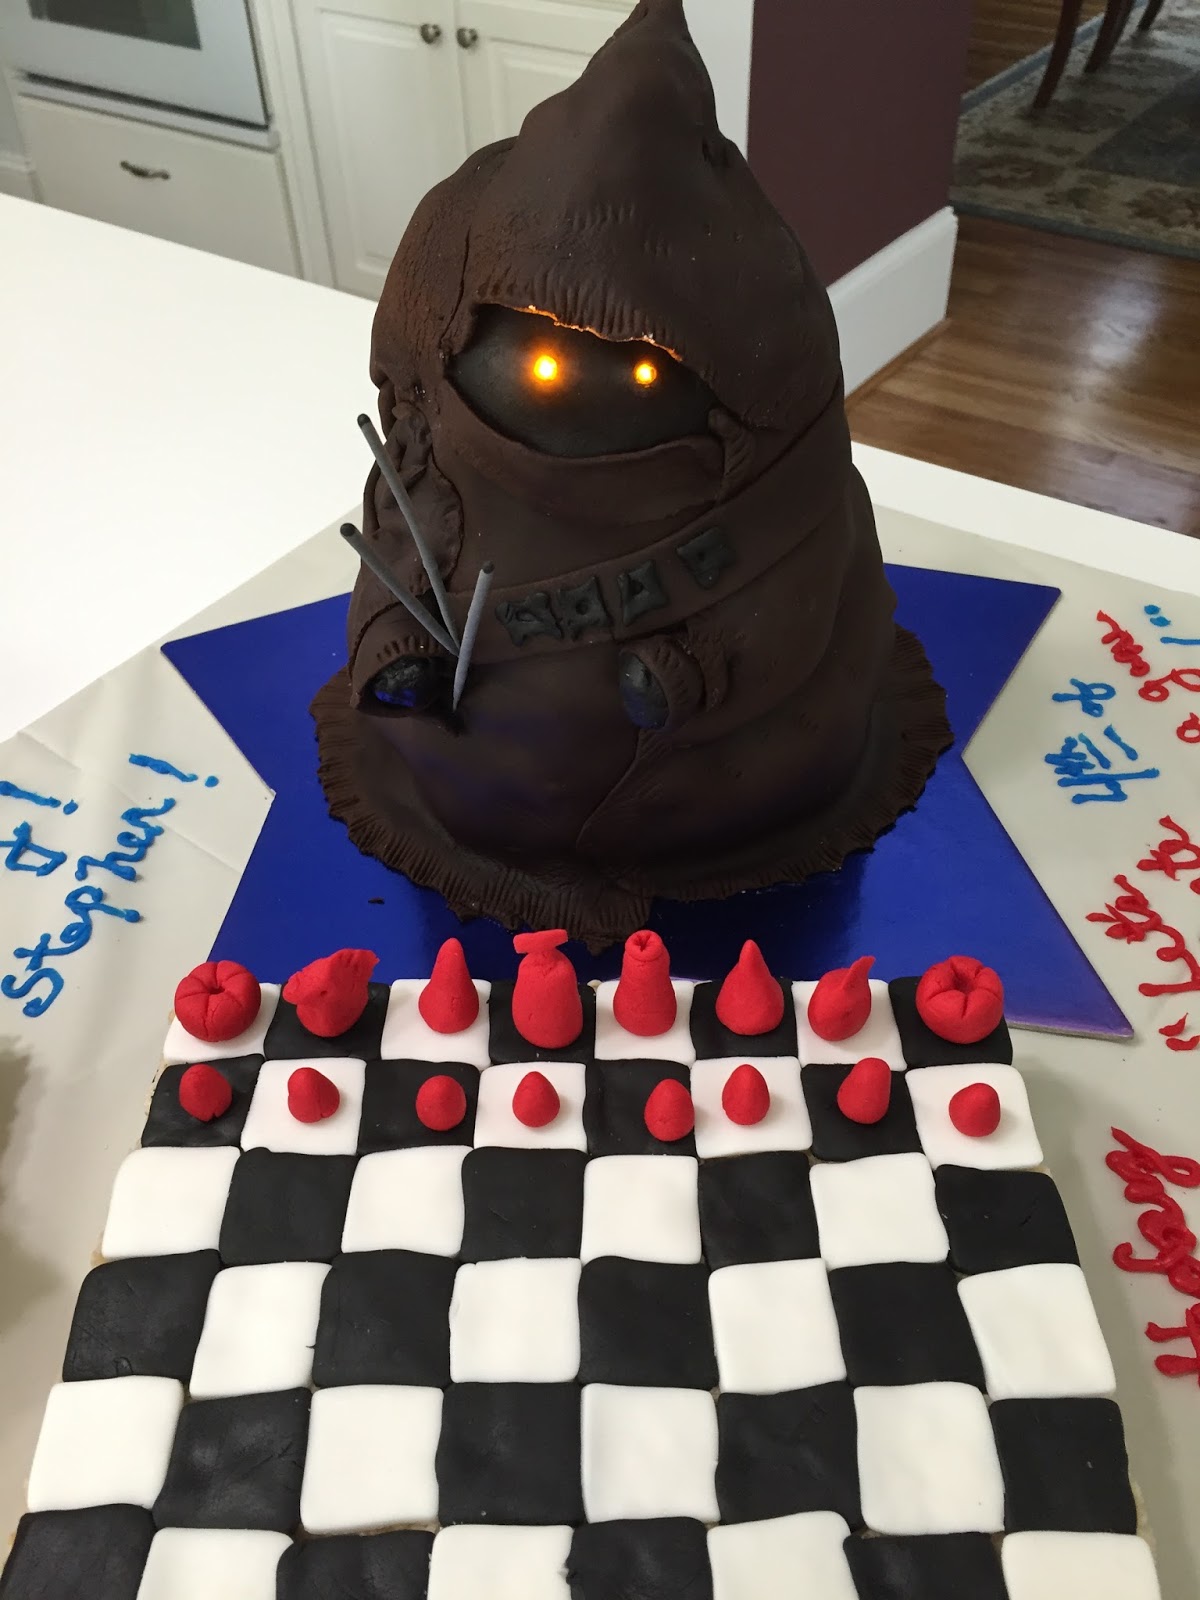
 My younger son combines his love for Star Wars with his true passion, chess, by cosplaying as the Chess Jawa.  (Look for him in front of the Marriott Starbucks during DragonCon!)  For his birthday, I made a Chess Jawa cake!

This cake is pretty easy if you have worked with rolled fondant.  Here are the instructions.

The day before the party, I baked a cake in the Wilton Stand-up Bear cake pan.  I followed the directions, using a regular pudding-in-the mix yellow cake mix and a pound cake mix, together.  The resulting cake was very nice both taste and texture.  One caveat - the directions say bake in the center oven rack, but the cake was too tall.  Use the lowest rack.  Also, the directions say 2/3 cup batter in the core, but only use 1/2 cup.  Mine baked up to the broiler element! 

If you want to include a chess board, make the chess pieces the night before too.  Because our party was close to July 4, I used red and blue fondant to make the pieces.  (Just shape the chess pieces by hand, as it if were play-doh!)
The next morning, I mixed a batch of buttercream icing (see recipe in the side menu), frosted and inserted the cake core, then trimmed the bottom of the cake so that it sat flat on the cake board.   I cut off the bear's ears and feet, then covered the entire cake in a layer of the icing.  Set it aside for an hour or so to really set the icing.  I used this time to make a pan of rice krispy treats for the chess board.

I rolled black and white fondant into sheets and cut out 32 squares of each color, sized to fit my chess pieces.  I turned the rice krispy treat upside down, so that The flat bottom was on top.  Starting with one corner of the rice krispy treat, I layered the chess pieces to make a traditional 64 square board.  I used a large knife to trim the rice krispies from the edges, then cut those into squares for folks to eat. 

Greg prepared 2 small orange LEDs for me, attaching them to button batteries and covering the batterse and wire with tape. The LEDs really make this cake pop!  I rolled a small bit of black fondant into an oval for the face.  Greg pushed the LEDs through the fondant.  The batteries stuck into the fondant on the back side. 

I covered the Jawa with a layer of Satin Ice dark chocolate fondant.  For this cake, use a high quality chocolate fondant - you can order online if you don't have a local source.  I used a little more than 1/2 of a 2 lb. tub.   Knead the fondant quite a bit - you want it smooth, pliant and glossy. 

I rolled about 1 lbs of well-kneaded fondant into a roughly triangular shape.  Using your rolling pin, position the fondant over the cake, so that the top of the triangle is above the head.  The "arms" of the triangle wrap around the cake, to form the robes.  

Greg helped hold the hood part of the fondant open while I got the bottom together.  I smoothed the seam where the edges overlapped and used my fingers to emphasis the arm of the cake bear underneath.   (I made the fondant reflect the shape of the bear.) 

Then, while Greg was holding the hood open, I slid the face (with the LEDs) in place, and arranged the hood piece around.  I tucked a little bit of trimmed rice krispy candy on top of the head to help hold the hood up, then trimmed the fondant on the sides of the hood to remove excess.

The face was a little short, so I rolled a bit of the trimmed chocolate and added this aound the chin.  I also used some of the trimmed bits to create sleeves and the bandolier.  For the arms, I made 2 small balls of rice krispy candy, covered them with black fondant, then inserted them into "sleeves" (really just a ring of chocolate fondant).  I pulled the ends of the rings and used 1/2 a thin bamboo skewer to attach them to the cake. 

I also rolled a long thin strip of chocolate fondant for the bandolier and finished that with little black fondant pockets. 

I finished Jawa by adding some "fraying" texture on the edges of the robes.  If you have a fondant toolset, use the shell tool.  If not, use the tines of a fork.  

Since it was a birthday cake, the Jawa is holding 3 sparkler candles! 


Monday, September 17, 2012

Jawa Cupcakes - Easy

Blogger JustJenn has some amazing Star Wars baking and party ideas!  (http://justjennrecipes.com/category/star-wars/)  All her stuff is very cool, but best of are all the Jawa cupcakes!  (I don't know how many people sent me the link to these! We do love Jawas!)   I decided to recreate the cupcakes for Dragon*Con 2012, and wanted to share my photos and recipes.

First, cute as her cookies were, Jenn's vegan chocolate cookie recipe didn't work for me.  The dough was way too crumbly; I could not get it to roll properly and it didn't taste right.  If you need a vegan recipe, do some searching online.  But  if you can use a recipe with real butter, that's definitely the way to go.  My rolled sugar recipe is posted in the Cookie and Frosting Recipe page linked to the side bar. I used this, but you can use your favorite rolled cookie recipe, any flavor.

I started by making my standard rolled snickerdoodle cookies, adding a fair bit of brown food coloring to the batter.  I put the dough in the fridge to chill overnight.  (Note - Jenn's cookies are much darker brown, which I like. Using a dark chocolate cookie dough is ideal for color. My kids love snickerdoodles best of all, however, so I didn't do a chocolate cookie.  The price: my Jawas' robes are a bit too light.)


In the morning, I used a box mix chocolate cake (Devil's Food) to make 2 dozen cupcakes.  Make the cupcakes kind of small - you want to minimize the crown as much as possible.  Jawa's like flat-topped cupcakes!  For fun, I used Star Wars cupcake papers from Party City.

While the cupcakes cooled, I rolled and baked the cookies.  As Jenn's blog shows, use the Star Wars jawa  cookie cutter from Williams-Sonoma, place the cookie on the baking sheet, then cut out the jawa's face.  I also dusted the cookies with a bit of cinnamon-sugar to give the robes some texture.


You'll need 24 cookies for the cupcakes.  My recipe makes several dozen, so I made the rest wookies and droids and we just ate those! (The dough was a good color for the wookies!) 

While the cookies were cooling, I made chocolate icing for the cupcake.  Jenn used a dark chocolate peanut better icing, but I wanted plain chocolate.   I used a pre-made dark chocolate icing for D*C, which looked great, but tasted lousy.  For these, I used my favorite homemade chocolate icing recipe, one from Alton Brown (Good Eats) - recipe is in the side linked page.   This icing is spectacularly yummy, but very light colored.  I was okay with that for these.  If you wanted darker icing, either use a dark chocolate recipe or else add brown coloring.

Accent the Jawa with 2 orange nonpareil or sugar eyes. Tip: use tweezers to place the eyes close together.  UUTINI!!!! 

Saturday, December 17, 2011

Peace on Endor - Medium

I made this cake for my Star Wars friends for our annual Life Day Party:  Peace on Endor!  Good Will to All Beings!


I made the fondant figures in advance:  Jawas untangling a box of Christmas lights, a Wookie and Ewok family decorating a tree with imperial helmets...


The wookie looked like he might have been in the eggnog.  (Plus he was a little tipsy on the cake!)
Secure the standing figures to the cake with skewers or toothpicks.  (The baby ewok is just sitting on the cake, with her candy cane, as is the kneeling jawa.  The standing jawa is built on a part of a sugar cone, so very stable.  I used orange nonpareils for the eyes.)

I baked a 14" round cake plus the small paisley cake.  I used 3 box mixes across the 2 pans.  Let cool and cover with white buttercream.

To make the tree, cover a plain sugar cone with green stars (using #16 Wilton tip and a tube of green icing) - pull the stars a bit as you release, to make "branches."  Decorate with small lights from a craft store, candies, and helmets.  Affix Lego helmets with a bit of green icing.  

On the top layer, we had Darth "I find your lack of Festivus disturbing" Vader with a Festivus pole. 


Just because.  Happy Holidays!  (And may the Force be with you, throughout the year!)

Sunday, August 21, 2011

Scene from Tatooine - Cookies

This was actually a quick and easy treat for our Star Wars fan club.

1.  Make a double batch of your favorite rolled sugar cookie or snickerdoodle cookie dough.  Roll dough and cut a mix of round and square cookies.  Also cut/shape some odd pieces, see picture.   As pictured, I used about 4 dozen cookies.  Cut small holes from the middle of 2/3rds cookies before you bake them, so that you can stack them on skewers.  Move cookies to baking sheet and sprinkle liberally with cinnamon sugar.  Bake and cool cookies per your recipe.

2.  Take a serving platter and hot glue 3 or 4 bamboo skewers to the base.  I used a clean flower pot saucer for my base.  Also, I did approximately 1 dozen cookies as large rectangles, with 2 hole, and I threaded those on 2 skewers so that I have a very tall stable "canyon wall" to hide the Jawas.  So the pictured dish has 4 stacks of skewered cookies, one round, one square and the bigger cookies on 2 skewers.

3.  Thread the cookies on the skewers, so you have 8-12 cookies per skewer.  (Cut skewer if it is too tall.)  Top the tower with a cookie that doesn't have a hole. Place other cookies around in smaller stacks, and fill in with the small odd-shaped cookies.

4.  Borrow your kids' Hasbro R2-D2 and Jawa figures to complete the scene!