Thursday, August 25, 2011

Cylon Cake - Difficult

 The cake actually isn't too hard, if you have a Larson Scanner...


This cake consists of 4 8" round layers, stacked with buttercream between each layer.  The top 2 layers are on a cake round, with dowels below for support and stability.

I molded Rice Crispy Treats to make the crest and face plate.  I cut a "window" for the Larson Scanner display.

Greg assembled the Larson Scanner from a kit (EvilMadScientist.com:  http://evilmadscience.com/productsmenu/tinykitlist/152-scanner?qh=YToxOntpOjA7czo2OiJsYXJzb24iO30%3D)   He used a fairly long wire for the battery pack, so the wire could wrap around the cake to the battery pack on the back of the cake board.

Greg also built a little shelf for the scanner from a thin piece of wood and encased it in a box made from a clear (grayish) plastic notebook divider page.  I placed bamboo skewers between cake round (under the 3rd layer) and the cake layer, so they protruded to make a little shelf.   I mounted the Larson Scanner on this shelf, placing the battery pack on cake board in the back.

I placed the rice crispy treat face place over the front and top of the caked, using liberal amount of buttercream to hold it in place. 

I covered the whole thing in gray-tinted rolled fondant, with the wire emerging from the back of the cake at the very bottom.  I covered the scanner with paper and sprayed the cake with edible silver spray color, to give it a shiny metallic look.   Remove the paper, turn on the power, and voila!

The Internet - Medium

I asked Greg what kind of cake he wanted for his birthday, and he told me he wanted a cake in the shape of the Internet.

The cake itself was easy - it's a 9" square cake cut in half and stacked, buttercream between the layers, covered with rolled fondant.  I also rolled a sheet of fondant for the cake board, to represent "the cloud" and added lots of fondant decorations.etc.  My personal favorite is the persistent tracking cookie, next to the facebook post.  The xkcd has text that appears when you pull the mouse.  

Sunday, August 21, 2011

Honey Bee Hive Cake - Medium

I saw a very cute bee hive cake pan, but didn't buy it - decided I could improvise!  You can too!  This cake is pretty easy.   I made it for a class party celebrating all the kids with summer birthdays.  Each child had his/her own bee.


In advance, make the bees using fondant.  Make the bodies and wings separately, when they are set, glue the wings to the bodies using black icing from a tube.  My bees were quite big, so they took several days to dry. 

1  Bake 4 layers - 1 each in a 10", 8", and 6" round pan.  Back a tiny layer in a 4" pan if you have one or else in a small Pyrex bowl, ramekin or cupcake pan (in a pinch).  These will be stacked as shown, to make the hive.

2.  When cool, level the bottom 3 layers, and stack, with yellow-tinted buttercream icing between the layers.  Add the top layer.  Cover the entire cake with open stars, using a Wilton  No. 16 or 18 tip.  If you have a larger tip, use that - I believe I used a Wilton 32.)  Note - put several layers of stars at the "steps" so it looks smooth, not stair-like.)

3.  Tint fondant yellow and roll several long snakes.  Wrap these around the cake layers as shown above, to emphasize the hive shape.   Add a small black fondant door.

4.  To finish cake, position bees using clear skewers.  (See note in the Death Star post about clear skewers.)  I also drizzled some gold piping gel around the top, as it looked just like honey.


WALL-E - Difficult

I made the WALL-E cake for the robotics team end of year party.  It was a big hit.  Only the orange box is cake, all the rest is inedible materials that I added for effect.  I removed it before serving.


In advance, make the arms, wheel units, shoe and head/eyes out of Styrofoam.  Cover with rolled fondant, using picture or photo above as a guide.  Find a piece of pliable black metal to use as the neck/head support.  We used a left over shelf support - my husband used his manliness to bend it as pictured.  (I really have no clue what he did, but it was perfect!)

Also in advance, make the fondant decorations for the front of the cake. (buttons, control panel, and the "E" in a red circle)

1.  You need a square block of cake.  Using a 10" square pan, this means you need 5 2" layers.   Bake all the cakes and let cool.  If you use an 8" pan, you'll need 4 2" layers.

2. Level the cooled cakes.  Do not skip this - if the cakes aren't level, your cake will be crooked and unstable.  See: http://www.wilton.com/cakes/making-cakes/leveling-cakes.cfm   

3.  Using square cake "rounds" (cardboard separators), make 1 2 layer cake and 1 3 layer cake, with buttercream icing between the layers.  I had to cut the separates from larger rectangular ones as my store didn't have square "rounds" in stock in the 10" size.


4.   Stack the 2 cakes on your cake board, using dowels to support the top cake.  (I used a plastic 10" cake stand that had little feet - nice to get the cake off the board so it looked right with the wheel units.) Do not skip the dowels!  Your cake cannot stand without dowels!   See: http://www.make-fabulous-cakes.com/tiered-cakes.html  

5.  Frost the entire cake smooth with orange tinted buttercream. 

6.  Using a can of red or brown edible spray color, spritz the cake unevenly to make it look worn.  Just a few sprays, being careful to not overspray.    Then add the fondant decorations.  Pipe gray stripes on edges using a large round tip, such as a Wilton No. 5.  Pipe the "WALL" using a No. 3 tip in black.

7.  Insert the black metal neck rod, with the head attached.  Using skewers, insert the arms. Note - the stripes on the arms should be on the side.  I attached them wrong, but didn't notice until much later.  Position the wheel units with skewers as well.   Set the shoe in front, adding a bit of Oreo cookie crumbs for "dirt" and an bit of plant.  (I used some spinach leaves.  I didn't have Oreo crumbs, so I used graham cracker crumbs, Oreo would have been better.)  

This is why I make cakes:


Death Star - Medium to Difficult

The Death Star cake is really 2 separate cakes.  The Death Star itself, plus a plain sheet cake (using the Wilton large paisley pan) upon which X-wings and TIE fighters wage a battle.  The Death Star looked great, but before we could photograph it, the board got bumped and the ball rolled off the stand and hit the floor.  Minutes before the party!  I touched it up, but you can see the damage.  C'est la vie.


In advance, make x-wing and TIE fighters out of fondant. I snagged some clear plastic skewers from the floral dept at my grocery store, and let the figures set in a block of Styrofoam.  (These are the skewers that hold little cards in a bouquet of flowers or a plant, just break off the prongs at the top.)  The TIE fighter wings are held on with toothpicks.  Break off bits of toothpick to get the right size.   

1.  Make a round cake using the Wilton Sports Ball pan.   Using 2 box mixes (same brand/flavor) make the large sheet cake using the Wilton Paisley pan.

2.  For the Death Star - frost smooth with gray buttercream.  Add rolled fondant panels on the sides, leaving a space open for the weapons crater.  When the icing is dry, depress the crater using a ping-pong size ball.  I used the ball from my track-ball style mouse.)  Use a Wilton No. 2 tip to add lines/detail to the crater.

Note:  I covered a tall plastic drinking glass with black fondant to serve as the stand for the Death Star.  I placed the Death Star on the stand, but did not "glue" it down with buttercream.  20-20 hindsight puts a big dollop of icing on that glass before I set the ball on it!

3.  For the other cake, to make as pictured, cover the cake with high-quality rolled fondant, tinted dark gray.  See my page on Rolled Fondant.  Alternative, frost smooth with dark gray buttercream.  Position the vehicles as shown (or as you like).  Finish with a row of small fondant balls (or buttercream open stars) around the base.


Millennium Falcon - Very Difficult

I made this cake several years ago, and it was well beyond my ability at the time.  It's one of the few cakes that I was not happy with, but the boys LOVED it.  Boys at the party immediately recognized it, and apparently that was what mattered.  I still pretty much hate the cake, but it's here for posterity.  And I guess it proves that even if you do something that's beyond you, the kids will still love it.  So shoot for the moon!  Or hyperspace, as the case may be.


In advance, make the satellite dish out of fondant.  Roll fondant, cut a circle, gently score with lines, and place in mini-cupcake pan to get shape.  Let set.  Make a big cone for the base and a small cone for the middle.  Use a bit of toothpick to assemble. 

Also have a good picture handy to help with decorating, esp. for the back.

1. Bake a 14” round layer using a Wilton pan – see pan direction for number of cups of cake batter needed. 

2. Use another mix to make a regular square cake, plus some cupcakes. 

3. Cut the square cake to make the front part of the ship.  Use gray-tinted icing to attach it to the round layer.  Crumb coat the whole cake with Buttercream. 

4. Roll a strip of fondant to lay across the top of round part to make the raised area in the middle.  Can also cut a strip of cake for this, but it is harder to get it to look right.  I think I also added a cupcake top in the middle, for extra height.

5. To make cake pictured, cover the whole cake with gray-tinted rolled fondant.  See: http://www.wilton.com/decorating/fondant/rolled-fondant.cfm  (See my Rolled Fondant Page - do not use Wilton fondant, use a soft, stretchy, high quality fondant.)    This is very tricky to do on the large, odd shape, so it may take some practice.  Be sure the icing is dry before you lay the fondant on it.  Alternative: frost smooth with gray icing.

6. Trim 3 cupcakes so that you have a “tube.” A skewer helps hold them together.  Frost and lay on side of cake.  

7. Decorate with yellow, black, red and gray icing as shown or per your picture.  Decorate back panel with black icing per picture or model.  Finish by adding the satellite dish on top.    

Star War Cookies v2

I have used the Williams Sonoma stormtrooper cookie cutter in other ways.  Here I used it as a pattern to create a TK image on a large chocolate chip cookie.  Just press the cutter onto the surface to make a pattern, and decorate as noted in the prior post.


Note - my son wanted a big chocolate chip cookie "cake" - but one cookie wasn't big enough, so I made  2 and just joined them.  Easy way to extend the quantity.

Star Wars Cookies


 We have the Star Wars Cookie Cutters from Williams Sonoma. 

The stormtroopers are my favorite (of course)!   Using a tube of Wilton Black icing and a No 1 or No. 2 tip, outline the black parts of the cookie.  Fill in with a bigger tip (No. 2 or 3), then press smooth with a dry finger.  I used white cookie icing for the white parts.  For best results, outline with a tube of white icing, the fill with the cookie icing.

For the other cookies, again - the secret is to do a thin outline of the area using a No 1 or 2 tip, then fill in the space.  When the icing is set, add details, such as the details on Fett's helmet, Yoda's eyes and ear hair, etc.  Darth is the hardest - black on black just doesn't show up that well.  I ended up just icing the cookies black and piping details with a No. 2 tip. 


Holidays On Hoth - Difficult

I made this cake for a Life Day party.  I'm not sure I can provide good instructions, as there were lots of details, but you can look at the pictures for ideas.  Overall it's not really a difficult cake if you have mastered fondant figures.  It did take a fair bit of time! 


1.  In advance, make fondant figures:  wampas and taun tauns, as needed for the scenes on your cake.  I also made the packages snowman and other decorations (candy cane, red part of the Santa hat, ice cave roof) - everything except the Christmas tree.  
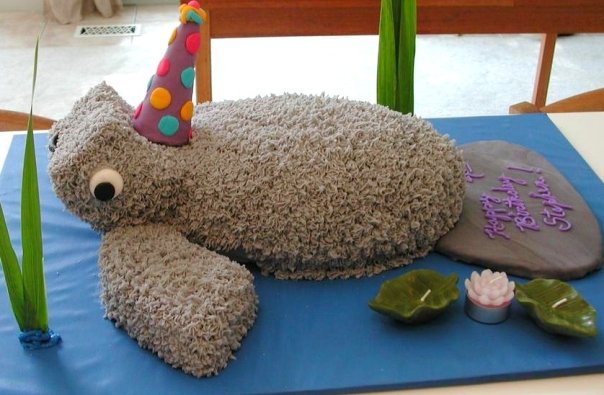
See my page on Working with Fondant.  You have to made the ice cave roof in advance, so it dries very hard - otherwise it would sag in the middle.  To make the wampas furry, I scored the fondant with fork.

2.  I made the base cake in the Wilton large paisley pan.   I also made 2 cakes using the small paisley pan.  I made one other cake, using a cathedral-style Bundt pan.

3.  I stacked the 2 small paisley cakes on the large cake, then added a section of the cathedral cake.  I frosted everything with Buttercream, using open stars to create texture on the cathedral section.

4.  I covered the open space between the top of the cathedral section and the paisley top with a thin peice rolled white fondant that I had rolled in advance for the ice cave roof..   I used buttercream open stars to attach this to the cake.  This created the ice cave.  I dusted the top with a bit of powered sugar to make it look snowy.


5. Once the icing holding the ice cave roof was set, I very carefully affixed a Lego mini-figure Luke to the roof with buttercream icing.   I positioned Luke's Lego light saber on the floor of the cave.  (Be sure to snag the Legos before you eat the cake, esp the light saber!)   I also added some iciles to the front of the roof, using a  Wilton No. 2 tip.

6.  I covered a green sugar-style ice cream cone with open stars (using a No. 16 Wilton tip).  I used a tube of kelly green icing.  Pull the stars a bit before you stop squeezing the tube to make "branches" on the tree.  I decorated the tree with a fondant star (cut using a little star cookie cutter) and with candy beads.  Apply the beads with tweezers.   

7.  Once the icing on the tree was set, I carefully positioned it on the very top of the cake, and positioned the taun tauns around it.  I added some small open stars with gray icing to make the taun taun fur. The lights were a decoration off a Christmas card and are not edible - you can find similar lights for crafts in your local craft store at the holidays.

8.  I positioned the wampas in the front, so they looked like they were awaiting the arrival of a friend.  I attached the Santa hat using white icing and a very small open start tip. (Wilton No. 13 or 14)  The arriving wampa's gift is also from the craft store.

9.  I positioned the remaining 2 taun tauns on the back, with the snowman and some little white fondant snowballs.  I piped the menorah on the back using tube icing and a Wilton No. 2 tip.  I used a No. 1 tip to make the candle flames.

10.  I finished the cake with a row of open stars along the base. 

 Wampa arriving for the gift exchange. Gift is not edible - from craft store.

  Taun tauns decorating a Christmas tree.  And having a snowball fight below.


You can see Luke in the ice cave.


Scene from Tatooine - Cookies

This was actually a quick and easy treat for our Star Wars fan club.

1.  Make a double batch of your favorite rolled sugar cookie or snickerdoodle cookie dough.  Roll dough and cut a mix of round and square cookies.  Also cut/shape some odd pieces, see picture.   As pictured, I used about 4 dozen cookies.  Cut small holes from the middle of 2/3rds cookies before you bake them, so that you can stack them on skewers.  Move cookies to baking sheet and sprinkle liberally with cinnamon sugar.  Bake and cool cookies per your recipe.

2.  Take a serving platter and hot glue 3 or 4 bamboo skewers to the base.  I used a clean flower pot saucer for my base.  Also, I did approximately 1 dozen cookies as large rectangles, with 2 hole, and I threaded those on 2 skewers so that I have a very tall stable "canyon wall" to hide the Jawas.  So the pictured dish has 4 stacks of skewered cookies, one round, one square and the bigger cookies on 2 skewers.

3.  Thread the cookies on the skewers, so you have 8-12 cookies per skewer.  (Cut skewer if it is too tall.)  Top the tower with a cookie that doesn't have a hole. Place other cookies around in smaller stacks, and fill in with the small odd-shaped cookies.

4.  Borrow your kids' Hasbro R2-D2 and Jawa figures to complete the scene!


R2-D2 - Difficult


Have a good picture handy to help with decorating.

1. Bake 8 round layers (8” is best, 9” okay). 

2.  Level each layer.  See: http://www.wilton.com/cakes/making-cakes/leveling-cakes.cfm  Do not skip this step!  Otherwise your cake will not be straight or stable! 

3. Using cake circles, create 4 2-layer cakes with buttercream icing between each layer.  Crumb coat with icing.

4.  Stack 3 of the cakes (to make a 6 layer cake) using dowels to separate each cake.  See: http://www.make-fabulous-cakes.com/tiered-cakes.html  Do not skip the dowels!  Your cake cannot stand without dowels!

 5.  To make cake pictured, cover with while rolled fondant. See: http://www.wilton.com/decorating/fondant/rolled-fondant.cfm  This is pretty tricky to do on such a tall cake, so it may take some practice.  Be sure the icing is dry before you lay the fondant on it.  Use a high quality fondant, such as Satin Ice - see my Rolled Fondant post for details.  Alternative 1: cover the 2 layer cakes with fondant, and just cover the "seam" with decorations.  Alternative 2:  frost smooth with white icing.

6.  Put the last cake on a thick silver cake drum.  Using a serrated knife, cut the dome shape.  Alternative, you can bake the last layer in a Pyrex bowl.  Frost with gray buttercream, and/or cover with gray rolled fondant.

7.  Tint fondant blue and gray.  Cut shapes from fondant for details (use sharp paring knife, cookie cutters).  Attach to cake by brushing very lightly with water.  (small brush or damp finger)

8. The red “eye” is the ball from my “track ball” style mouse. It really looked good – see if you have something handy to use for this!  Or else use a fondant sphere, rub with vegetable oil to make the ball shiny.

9. Decorate base with balls of fondant.

10. Create arms out of Styrofoam or Rice Crispy treats, cover with fondant, decorate and position.

Note – this cake is pictured on a stand using for decorating from Joann’s or Michael’s – it made a perfect base for R2!


Octopus Cake - Medium


We didn't want the squid to get lonely!  If you are new to covering cakes with rolled fondant, this is an easy place to start.  It requires the Williams Sonoma Octopus Pan - see http://kitchen-goddess.yumsugar.com/Williams-Sonoma---Octopus-cake-pan-670344  (maybe find on Ebay!)

1.  Bake a box mix in the Octopus pan. Let cool, move to serving plate and crumb coat with buttercream frosting.

2.  Tint a good quality fondant pink (or your choice of color) and roll a piece very thin.  Using your rolling pin, move the fondant to cover the cake.  Starting at the top of the octopus' head, smooth the fondant over head and tentacles, using your hands. It doesn't have to be perfectly smooth.  Be careful that you don't tear the fondant.  Trim ends so there isn't too much extra fondant.

3. Create fondant eyes for the octopus.  (I used blue nonpareils for detail).  Made the mouth with a bit of red fondant, or else pipe a mouth from a tube of red icing using a Wilton No. 2 tip (or similar). If desired, apply "smarties" candies to the tentacles to make suckers, as shown.  I also used a No. 5 decorating tip to lightly press round indentations in the tentacles.  

4.  Tint buttercream icing light blue.  Cover the rest of the cake with open stars, using Wilton No. 16 or similar tip, covering the ends of the rolled fondant. 

5.  If desired, tint bits of fondant different colors and use cutters to make shells, crabs, other creatures.  (The green moray eel was handmade.)   Can also decorate with candy beads, as shown.
 

 Note - I turned a serving platter over to use as a cake plate.  I didn't want the cake "in" the bowl, and it worked perfectly when used upside down.  You can be very creative with presentation too!

Manatee Cake - Easy to Medium


1. Bake a box cake mix in the Wilton Football pan.   

2. Bake another cake using regular pans (8” or 9”), so you get 1 each round layer and square layer.  

 3. Frost the “football” with gray-tinted Buttercream icing using Wilton #16 star tip.   

4. Cut front flippers from the round layer, position and frost with stars. 

4.   Level the square layer.   Cut the square layer in half, then cut the half in half again, so you have 2 quarters.  Make a 2-layer cake from these quarters, with buttercream in between the lawyer.  Frost with stars.  This is the manatee's head.  Note – these direction have the head flat on your cake board. This is easy.  To make the head stand up as pictured, tape a bit of bent coat hanger wire to a piece of cardboard, put the head on this and brace under the body.  Do this before you frost!  This changes the difficulty rating to medium, as you have to manage the structural aspects. 

5. Cut a piece of cardboard for the tail.  Roll gray-tinted fondant very thin,  cover the tail. 

6. Make eyes & mouth from fondant.   

7. If desired for a birthday party, cover a “sugar” ice cream cone with fondant tinted as you like, decorate with dots or stars, etc. to make a party hat.  Position on the manatee's head, as show.